How Hydraulic Brakes Work: Pascal's Principle Model
- Time
- 30 min
- Difficulty
- Medium
- Best for
- Class 6-8
- Subject
- Physics
- Things needed
- 7, 4 at home
- Steps
- 12
- Cost
- Low, a few things to find
- You will learn
- Pascal's Law and Fluid Pressure
What you need
0 of 7 readyTap each thing once you have it in front of you. Items with the house sign are already somewhere in your home.
- 50 mL syringe (without needle) 1 pc No luck? Use available at any medical store (chemist shop).
- 10 mL syringe (without needle) 1 pc No luck? Use available at any medical store (chemist shop).
- Saline pipe / IV tube (flexible transparent tubing) 1 meter No luck? Use aquarium air pipe from a pet shop or local bazaar.
- 🏠 Tap water 100 mL
- 🏠 Food colour or ink A few drops No luck? Use liquid watercolour or fountain pen ink to make water visible.
- 🏠 Zip ties or thin binding wire 2-3 pcs No luck? Use insulation tape or strong rubber bands.
- 🏠 Cardboard piece or wooden block 1 base No luck? Use old shoe box or plastic tray for support.
What do you think will happen?
Real scientists guess before they look. Write one line now. After the steps, the page will show it next to what you should see.
Saved on this device- Wear safety goggles to protect eyes from potential fluid squirts if tubing disconnects under pressure.
- Avoid using industrial hydraulic fluids or mineral oils, as they can cause skin or eye irritation.
The procedure
Tap a step when it is done. Lab mode shows one step at a time in big letters, reads it aloud if you want, and keeps the timer.
- Put on safety goggles to protect your eyes from potential fluid squirts.Always wear eye protection before pressurizing liquids in tubing.
- Mix a few drops of food color into 100 mL of tap water inside a small container.
- Fill the flexible tubing completely with the colored water until no air remains inside.Ensure all air bubbles are removed, as trapped air will compress and weaken force transfer.
- Fill both the 10 mL syringe and the 50 mL syringe entirely with the colored water.
- Push one end of the filled flexible tubing tightly onto the nozzle of the 10 mL syringe.
- Attach the other end of the tubing firmly onto the nozzle of the 50 mL syringe.
- Secure both hose connections with zip ties or thin wire to prevent leaks under pressure.Do not use industrial hydraulic fluids or mineral oils, as they irritate skin and eyes.
- Clamp or secure the body of the 50 mL syringe to a stable cardboard or wooden support block.
- Slowly push the plunger of the smaller 10 mL syringe inward with your thumb.
- Observe the plunger of the larger 50 mL syringe moving outward slowly and forcefully.
- Push the plunger of the larger 50 mL syringe back inward.
- Note how the plunger of the smaller 10 mL syringe moves outward rapidly.
The Concept
Hydraulic brakes use an incompressible liquid to transmit pressure from your foot on the brake pedal directly to the brake pads at the wheels. By connecting a small cylinder to a larger cylinder, the system amplifies your input force without needing complex gears.
Observation
When you push the plunger of the small syringe, the plunger of the large syringe moves outward slowly but with noticeable strength. Conversely, pushing the large syringe plunger inward causes the small syringe plunger to shoot out rapidly.
If you place a light weight or object against the larger syringe's plunger, pushing the smaller syringe easily pushes that weight outward, demonstrating clear force multiplication.
Why It Happens
When you push the water inside the sealed tubing, the liquid cannot be squeezed into a smaller space because water is incompressible. Instead, the force you apply creates pressure inside the liquid that spreads instantly throughout the entire tube.
Think of it like a crowded queue of people standing shoulder to shoulder in a tight corridor. If someone at the back gives a push, that push travels through every person in line and pushes the person at the very front.
Because the larger syringe has a wider surface area, that spread-out pressure acts against more total area, turning your small push into a much stronger output force.
The Science Behind It
In fluid mechanics, pressure (P) is defined as the force (F) exerted per unit area (A):
$Pressure (P) = Force (F)Area (A)$
Pascal's Law states that when pressure is applied to a confined, incompressible fluid, it is transmitted undiminished to every part of the fluid and the container walls. Because the pressure remains constant throughout the connected system (P1 = P2), we can write:
$F1A1 = F2A2$
Rearranging this formula to find the output force (F2) gives:
$F2 = F1 × (A2A1)$
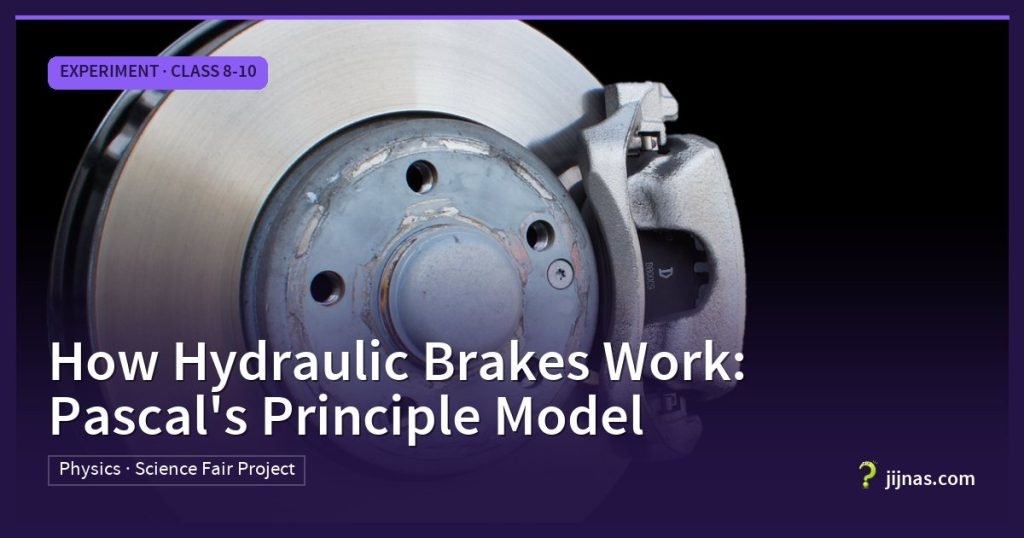
Since the area of the slave cylinder (A2) is much larger than the master cylinder (A1), the output force (F2) is multiplied. In a car, pressing the brake pedal exerts a small input force on a narrow master cylinder. The brake fluid transmits this pressure to wider brake pistons at the wheels, generating massive force to clamp the brake pads against the spinning disc.
Make It a Project
To turn this working model into an investigation for a science fair, explore how varying system parameters changes output performance:
- Independent Variable: Cross-sectional area ratio between the input syringe (master) and output syringe (slave).
- Dependent Variable: Maximum mass lifted by the output plunger and the displacement distance ratio.
- Control Variables: Type of fluid used (water), fluid temperature, tubing length, and complete absence of air bubbles.
Data to Record
- Input and output syringe diameters and calculated cross-sectional areas ( ext{cm}2).
- Input plunger displacement distance ( ext{cm}).
- Output plunger displacement distance ( ext{cm}).
- Input mass required to lift a fixed output load ( ext{g} or ext{N}).
- Theoretical mechanical advantage (Area ratio) versus actual measured mechanical advantage (Force ratio).
Presentation Tips
- Include a live working model on your table so judges can manually push the input plunger and feel the force multiplication.
- Use brightly dyed water in clear tubing to make the fluid flow visually distinct from a distance.
- Prepare a quick side by side trial with an air filled syringe system to clearly demonstrate why air bubbles ruin braking force through compression.
- Draw a large visual diagram linking your dual syringe model directly to a real car brake pedal, master cylinder, and wheel caliper setup.
Advanced Questions to Explore
How does dynamic fluid viscosity and heat induced thermal expansion in commercial brake fluid (such as DOT 4) alter pressure transmission efficiency under extreme braking conditions compared to an ideal incompressible fluid model?
FAQs
Why do we use water or oil instead of air in hydraulic brakes?
Liquids like water and oil are incompressible, meaning their volume does not shrink under pressure. Air is compressible, so pushing a syringe full of air just squeezes the air bubbles instead of passing the force directly to the other side.
Does a hydraulic brake system create free energy?
No, it does not create free energy. While the output force increases, the distance the larger piston moves decreases by the exact same ratio. Total work done, which is force multiplied by distance, remains constant throughout the system.
What happens if there is an air bubble in a car brake line?
Air bubbles absorb the pressure you apply to the brake pedal by squishing down. This causes a spongy pedal feel and prevents the full stopping force from reaching the brake pads, making the brakes unreliable and dangerous.
How do you calculate the force multiplication in this experiment?
Divide the cross-sectional area of the large syringe by the area of the small syringe. Multiply your input force by this ratio to find your output force. A large syringe with three times the area provides three times the force.
Why is the master cylinder smaller than the wheel cylinder?
A smaller master cylinder requires less input force from your foot to build up high pressure. That same high fluid pressure then acts on the larger wheel cylinders, creating the massive force needed to stop a heavy vehicle.
Your lab notebook
Two minutes here and your lab record is done. Everything stays on this device until you copy it out.
The physics or chemistry on this bench is what a working business charges for. See the numbers, the licences and the worst case before anyone spends a rupee.
 📈 Diploma · Instrument MechanicCalibration Lab Operations & Accreditation GuideMaster industrial calibration lab operations, ISO/IEC 17025 accreditation, equipment setup, traceability, and tiered pricing models for instrument mechanics.modelmechanicscalibrationinstrument
🧠 Understood the science? Prove it
Short quizzes on the same physics and chemistry. Free, timed, every answer explained.
Next on the bench
 Kinetic & Potential Energy Interconversion on Curved TrackMeasure potential and kinetic energy transformations of a marble rolling on a curved track using simple tracking tools and physics equations.Sliced flexible PVC conduit pipe (1.5 meters) or toy track🏠 Glass marble (kancha) or steel ball bearing🏠 Measuring tape or 1-meter steel scale🏠 Smartphone with slow-motion video or stopwatch app+3 Medium⏱ 45 min12 steps⚗️ Class 9-12
 Footstep Electricity: Piezoelectric Energy Tile ProjectLearn how to build a piezoelectric energy harvesting floor tile that turns footstep pressure into electricity to light up LEDs and charge…Pre-wired brass-backed piezoelectric discs (27mm or 35mm)1N4007 rectifier diodes (or MB10S bridge rectifier)Electrolytic capacitor (100uF to 470uF, 16V or 25V)5mm high-brightness LED (red or green)+4 Medium⏱ 2-3 hours13 steps⚗️ Class 9-12🧑🔬 with an adult
 How Solar MPPT Optimizes Panel EfficiencyLearn how Maximum Power Point Tracking (MPPT) uses dynamic DC-DC conversion to keep solar panels operating at peak electrical efficiency.10W to 20W 12V Solar PanelArduino Uno or Nano Microcontroller BoardINA219 I2C Current and Voltage Sensor ModulesAdjustable Buck Converter Module (LM2596 or XL4015) or IRFZ44N MOSFET Circuit+5 Advanced⏱ 3 - 5 hours12 steps⚗️ Class 9-12🧑🔬 with an adult
 Nitinol Heat Engine: Thermal to Mechanical EnergyLearn how a Nitinol wire heat engine converts thermal energy into mechanical rotation using solid-state phase transitions in shape memory alloys.Trained Nitinol wire loop (0.5 mm thickness, 50-70 degree Celsius transition)Plastic pulleys with ball bearings (one small ~3 cm, one large ~7 cm)🏠 Support frame base (acrylic sheet or wooden plank with stand rods)🏠 Heat-resistant steel bowl or glass beaker (250 ml)+3 Advanced⏱ 45 min11 steps⚗️ Class 9-12🧑🔬 with an adult